

Rooftrellen - Treant Protector
Introduction
Rooftrellen is by nature a support hero. All of his skills reflect this, they are not damage orientated but rather are influential in team support. In order to play this hero in the most effective way your item build and combat strategy must optimise the role of supporter rather than focussing on creating an uber hero killer. If you want the glory for yourself, Rooftrellen, I am afraid, is not the hero for you. If you enjoy helping your team to victory through more subtle means and being your team-mates favourite ally then read on...
 Stats
StatsStrength 27 + 3.4 per level
Agility 10 + 1.0 per level
Intelligence 17 + 1.8 per level
Pros
Highest strength gain of any hero
Highly synergised to a particular role
One of the most effective ultimate abilities in the game
Cons
Low base armour
Not the most effective hero in 1 v 1 situations
Skills
 Nature's Guise
Changes a target friendly unit's appearance so that it blends in with the forest. It is invisible to an enemy's eyes, but it must remain near a tree, or the guise is lost.
Level 1 - Lasts 15 seconds.
Level 2 - Lasts 30 seconds.
Level 3 - Lasts 45 seconds.
Level 4 - Lasts 60 seconds.
This skill is used both for escaping from tricky situations and for ambushing enemy heroes (specifically ganking purposes). The downside to this ability is that you must be near trees for the guise to work.
 Eyes in the Forest
Creates a spiritual link between Rooftrellen and a target tree, allowing Rooftrellen to see the tree's surrounding area at all times. Mana cost decreases per level.
Level 1 - 300 second cooldown.
Level 2 - 225 second cooldown.
Level 3 - 150 second cooldown.
Level 4 - 75 second cooldown.
This ability allows Rooftrellen to place wards on trees around the map which last indefinitely and can see invisible units. The downside is that the wards have a low area of vision and are easily countered (Ancient Tango of Essifation's and a number of area of effect spells).
 Living Armor
Magically creates an armor of vines around a friendly unit, protecting it from harm and healing wounds.
Level 1 - Adds 2 armor and regenerates .75 hit points per second.
Level 2 - Adds 4 armor and regenerates 1.5 hit points per second.
Level 3 - Adds 7 armor and regenerates 2.25 hit points per second.
Level 4 - Adds 10 armor and regenerates 3 hit points per second.
This is a great spammable armour/regeneration spell. It is particularly useful in negating Rooftrellen's low base armour issues and for casting on all allies.
 Overgrowth (Ultimate)
Summons an overgrowth of damaging vines and branches. Prevents all nearby enemies from moving or attacking and deals 95 damage per second to each.
Level 1 - Lasts 3 seconds.
Level 2 - Lasts 4 seconds.
Level 3 - Lasts 5 seconds.
This is the spell that turns Rooftrellen from a good hero to a great hero. Simply awesome in late game team battles due to its mass disable. (NB enemy heroes will still be able to cast most spells whilst overgrowth is active)
Skill Build
1. Eyes in the Forest
2. Living Armor
3. Living Armor
4. Nature's Guise
5. Living Armor
6. Overgrowth
7. Living Armor
8-10. Eyes in the Forest
11. Overgrowth
12. Stats / Nature's Guise
13-15. Stats
16. Overgrowth
17-22. Stats
23. Nature's Guise / Stats
24-25. Nature's Guise
The first skill obtained is Eyes in the Forest allowing a ward to be placed immediately. The first skill to be maxed is Living Armor as it is a fantastic defensive buff which will aid Rooftrellen and his team in combat. Nature's Guise is taken at level four as both an escape tool (if either Rooftrellen or his lane partner is near death) and a ganking tool. Eyes are maxed next, so that by level 10 a ward can be placed every 75 seconds giving Rooftrellen's team a degree of map control. Rooftrellen will have acquired Perseverence by this stage so will have enough mana to sustain multiple eye placements. Stats are maxed next in favour of Nature's Guise for two reasons. The first is that choosing stats enables double growth rate for heroes (+6 attribute bonus per level). The second reason is that it enables sufficient mana for a double overgrowth to be acheived at a low level. Overgrowth is maxed immediately. At level 12 Nature's Guise can be taken in place of one Stats gain if you feel that 30 seconds of invisibility is required.
This skill build is centred on obtaining an early double ultimate whilst utilising the fantastic support potential of Rooftrellen's abilities. Going Stats/Eyes early and learning Living Armor later would grant sufficient mana for a double Overgrowth even faster, however after playtesting both builds I feel the build detailed above is superior in the majority of situations.
Item Build
1.
 Ring Of Health (875)
2.
 Void Stone (900) -- Perseverance
3.
 Boots of Speed (500)
4.
 Oblivion Staff (1925)
5.
 Refresher Orb (1875)
6.
 Staff Of Wizardry (1000)
7.
 Belt Of Giant Strength (450)
8.
 Level 3 Necronomicon (3900)
Total Cost - 11425 gold
Optional extra
9.
 Heart Of Tarresque (5500)
Boots of Speed gives Rooftrellen manoevrability in combat which helps him use his ultimate in a good position as well as being harder to kill when chased. The Refresher Orb gives nice bonuses to regeneration and damage but its most important purpose is activating the double overgrowth (10 second AOE disable). In order to activate the double ultimate 975 mana is needed, which is why the staff of wizardry is the next item on the list for +10 intelligence. This leads on perfectly to Necronomicon. I cannot speak highly enough of this item for Rooftrellen, having two high DPS, mana-burning mages hacking away for 10 seconds along with Rooftie greatly enhances his damage in a team battle. Necro also gives nice stat gains to strength/intelligence and increases your support role within the team thanks to the movement speed aura.
11425 gold will take around about an hour to farm for Rooftrellen. Utilising this build allows the Refresher Orb to be completed at around level 14-16. Necromonicon level 3 at level 19-21 and Tarresque at level 24-25. Please note that Tarresque is just a nice addition rather than a core item, it increases Rooftrellen's survivability against powerful combat heroes.
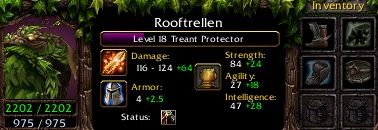
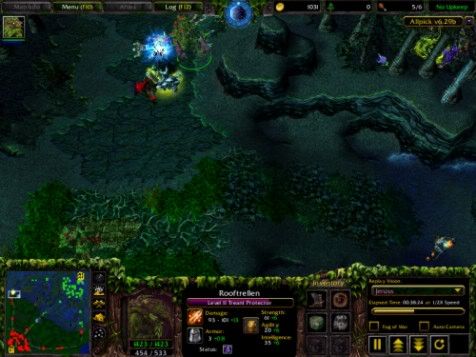
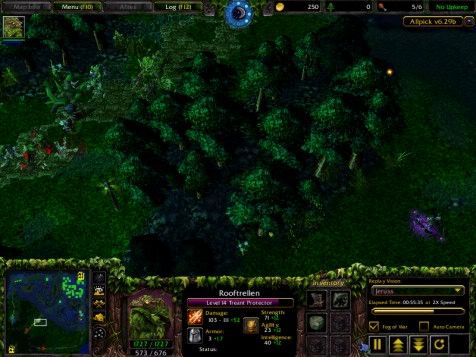
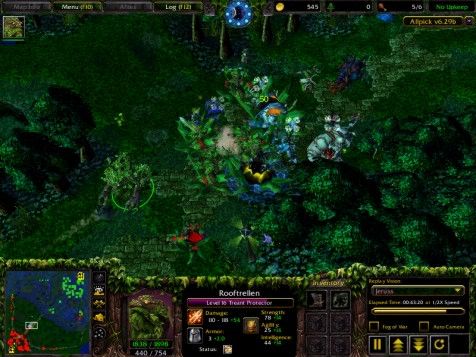
This image shows the value of taking stats early. As you can see Rooftrellen has enough mana for a double ultimate at level 18. When using this skill build 975 mana is usually acquired between levels 18-20. If the skill build favoured Nature's Guise over stats, obtaining sufficient mana for the double Overgrowth would occur at a later level.
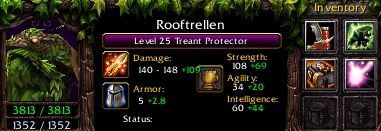
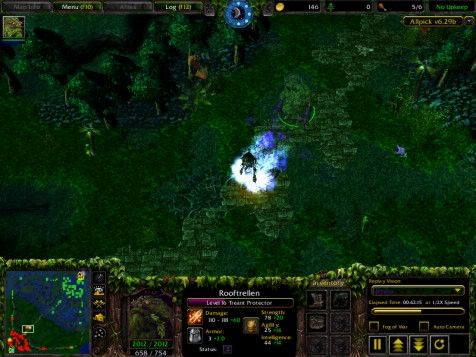
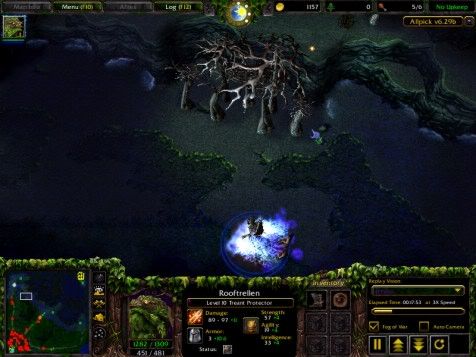
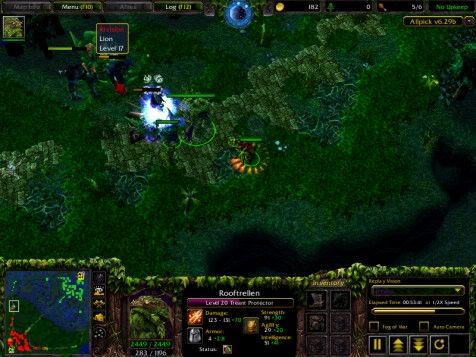
This image shows Rooftrellen at level 25, few games last this long but its nice to know that Rooftrellen is ready for the long haul. Rooftrellen doesn't lose effectiveness late game like many other heroes.
Other Items to Consider
 Mekansm (2434)
Mekansm is a fantastic item for any support hero. It gives Rooftrellen a valuable +5 armour to negate his low base armour issues. As well as this Mekansm grants +5 to all stats, a +3HP regen aura and most importantly a 250HP/2 armour AOE heal. The downside to this item is the relatively high cost, due to Rooftrellen's farming limitations it is a large deviation to obtain this item before the Refresher Orb. A strong late game possiblity however.
 Guinsoo's Scythe Of Vyse (5175)
Guinsoo's is a fantastic alternative to Necronomicon as Rooftrellen's secondary item. It grants Rooftrellen sufficient mana for the double overgrowth as well as more disabling potential (6 charges of cyclone from Euls and a 3 second hex from the Guinsoo's). If you are fighting against a large number of combat heroes who are not mana dependant then this item is your secondary item of choice. For a mixed opposition with some mana dependant heroes I would still suggest Necronomicon due to its synergy with Overgrowth.
Strategy
Early Game (Levels 1-7)
Rooftrellen should always have a partner in his lane if possible. This is because he doesn't need the bonus experience granted from soloing as much as more combat orientated heroes and he can be a big help early game to his lane partner due to his skills. The best lane for Rooftrellen is up if he is playing Sentinel or down if he is playing Scourge, this is because these lanes are closest to the secret shop (Perseverance) and have many trees nearby. Going middle is a bad idea as Rooftrellen will find it difficult to farm against the ranged heroes who usually go mid and will not be able to use his guise to escape due to a lack of trees.
As soon as Rooftrellen spawns he should make his way to his optimal lane. An eye should immediately be placed in the river between the centre lane and Rooftrellen's lane. After a small period of time Rooftrellen will have acquired 875 gold and should buy the ROH from the secret shop. Living Armor should be used mainly on Rooftrellen's lane partner as he is likely to need the benefits more than Rooftrellen. At level six Rooftrellen should cast his ultimate if the opportunity for the kill arises. Three seconds should be enough for you and your partner if the opposing hero does not have a huge amount of hp left. By level seven Rooftrellen will usually have acquired another 900 gold allowing Perseverance to be completed.
Mid Game (Levels 8-15)
During this stage of the game Rooftrellen should continue to farm in his lane but he should be ready to quickly move to another lane or help his team in a tower push/gank if the need arises, on top of this he needs to place eyes in useful areas of the map whenever the opportunity arises. From level 10 onwards swapping lanes with allied heroes is a good idea in order to spread the Eyes in the Forest to all areas of the map. Rooftrellen should never roam the map on his own looking for chances to kill heroes as he is not a solo hero killer and needs to keep up a steady gain in exp and income to be effective late game. However, if the opportunity for his team to kill one or more enemy heroes is presented to Rooftrellen he should not hesitate to cast Overgrowth.
Nature's guise should be utilised offensively for ganking dangerous enemy heroes, make sure it is cast on each hero outside the enemies vision. Guise is also needed as an escape if the enemy team attempts a gank against Rooftrellen and his lane partner. Rooftie unless heavily nuked early game should make his first fountain trip after he has acquired Perseverance and 1650 gold. He should proceed to purchase Boots of Speed and the Quarterstaff. The Oblivion staff should be completed and the Refresher Orb recipe bought when the necessary gold is acquired.
During both the early and mid games Rooftrellen should play Conservatively, dont chase after hero kills (you are a supporter) but do your best not to die. If at level 15 you have zero kills and zero deaths dont worry, you are doing ok.
Late Game (Levels 16-25)
By level 16 Rooftrellen will usually have acquired the Refresher Orb. This is Rooftrellen's strongest game period due to the huge team battles which will take place. Until enough mana is obtained for a double ultimate Rooftrellen should click refresh every time he uses Overgrowth so it is ready for the next key battle.
Rooftrellen should no longer farm in his lane but should help his team in pushing and defending where his skills can be put to best use. Battle strategy for Rooftie is very simple; Once both sides heroes are engaged and the enemy heroes are within Overgrowth's AOE then cast it. It is a good idea to use nature's guise to get into position as you will be the prime target for enemy disablers. Dont be frightened to be right in the middle of the fight as Rooftrellen's enormous strength allows you to tank a good deal of damage. Necronomicon once obtained will enable the Treant protector to deal a large amount of damage to the enemy during Overgrowth's disable. The demon mages should attack mana dependent heroes, effectively removing their ability to participate in the battle. If the surviving enemy heroes flee after the battle then support your team by utilising the ranged demon mage's movement speed aura to boost the chasers.
Defensive use of Nature's Guise
The invisibility granted from Nature's guise makes it a fantastic escape spell. If you feel at any time that either Rooftrellen or one of his allies is near death then make sure to cast the guise (hotkey "t"). If cast on yourself move to a safe location out of range/vision of enemy heroes before the guise timer expires. Make sure you remain close to a tree at all times.
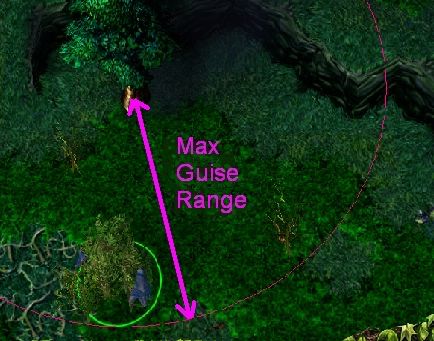
This image shows the maximum distance away from a tree you can move under the influence of Nature's guise (approx three Rooftrellen models). Moving any further away causes the subject to become visible.
Offensive use of Nature's Guise
As well as being a fantastic escape tool, Nature's guise is equally useful as an ambush/ganking tool. Utilise the invisibility to position and co-ordinate an attack against enemy heroes.
In this image I am farming happily mid-game and clinks has asked me to help him kill the pesky Zeus. First i creep up on him using Nature's Guise (Make sure before casting that the subject of the spell is near a tree, see diagram above, otherwise the spell will have no effect)...Clinks is ready to do his thing as soon as I give the signal and cast Overgrowth.
All goes to plan and Clinks gets the kill, this should never bother you as a treant protector player. Clinks needs the gold for items more than you do.
In this image nature's guise is being used for ganking purposes. Rooftrellan and Bradwarden lay hidden under the guise and prepare to move in on Lich, the unsuspecting victim. Guise should be fully utilised for ganking in competitive team matches.
Utilising Living Armor
Bit of a no-brainer here. Spam the free armor and regeneration given from Living Armor, allies are higher priority for this spell than Rooftrellen as the old tree is more than hard enough to take care of himself. If you expect Rooftrellen to take damage or you need some serious regeneration dont hesitate to cast it on yourself.
(Tip: When playing Rooftrellen have your left thumb over the "v" key during play as you will be using living armor often. Your two reflex hotkeys are "r" Overgrowth and "t" Nature's guise. These are located next to each other on your keyboard, get used to quickly tapping them when the need arises)
Placement of the Eyes in the Forest
It took me a number of games to learn where the best spots for the eyes are. The simplest way of describing their effective use is as anti-ambush agents. Put yourself in the enemies shoes and think "where would i attack that hero from if they farm in that lane?", place a ward in that spot to make sure the attack is not in effect an ambush. I recommend the first two eyes being placed at either side of the river as they are common attack points throughout the game.
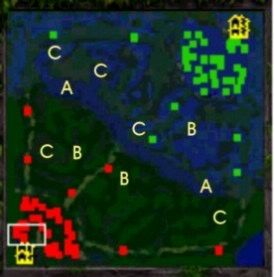
This shows some good general places for the eyes in the forest.
A - vital eye spots
B - important eye spots
C- useful eye spots
A - vital eye spots
B - important eye spots
C- useful eye spots
In this image Traxex is trying to come up behind Rooftrellen and Veno, the eye placement makes sure her efforts do not go unnoticed. This demonstrates the chief power of the Eye's. They allow your team to pick its fights so to speak. If you are being ambushed you can retreat and if the enemy is in a vulnerable position, your team can move in for the kill.
(Tip: The eyes in the forest can detect invisible units. Because of this they are especially powerful against heroes who rely on invisibility such as the stealth assassin and the goblin techies, when fighting against the techies be sure to place the eyes in areas where you feel remote mines are likely to be placed. Necronomicon further enhances your power over heroes relying on invisibility thanks to the truesight granted.)
The river is the most common way of heroes moving from lane to lane. In this image Lich is using the river to try and come up behind Rooftrellen. The river eye spots are vital for any team.
Effective use of Overgrowth
In order to effectively use this skill we must first analyse it's strengths and limitations:
1. Overgrowth Disables All Units caught in the vines for 3/4/5 seconds respectively. Units under the effects of Overgrowth cannot move or attack.
2. Overgrowth Deals 95 damage per second to all units caught in the vines.
3. Overgrowth reveals invisible units which are caught in the vines, however units within the AOE that Rooftrellen does not have vision of will not be disabled.
4. Most spells can still be cast whilst units are caught in the vines, most notably: Poison Nova, Freezing Field, Black Hole and Epicentre.
5. Overgrowth interrupts channeling spells as soon as it is cast. Therefore if the spells mentioned above are being channelled Overgrowth is the perfect counter.
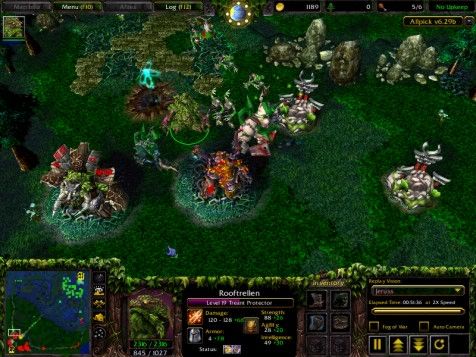
6. Overgrowth has an approximate area of effect of 700. This range is demonstrated visually below.
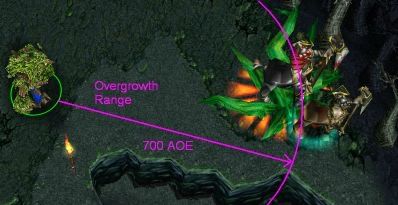
As you can see the Warchief is caught in the vines but the smaller Centaur is just outside of the range of this spell. The huge area of effect of Overgrowth means that with practise you should be able to disable all of the enemy heroes fighting in a team battle.
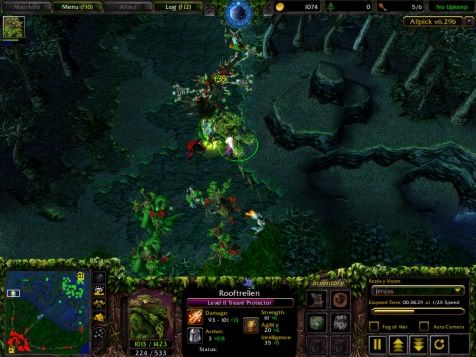
In this image I am the unwelcome guest at the teaparty so to speak. I see that a team battle is engaged so i first utilise nature's guise to move into position without attracting attention. With the invisility granted by guise I move within range to catch all of the enemy heroes in Overgrowth then tap "r". I then proceed to attack a low-health enemy hero. This team battle would have been close but thanks to Overgrowth it is about to become painfully one sided...
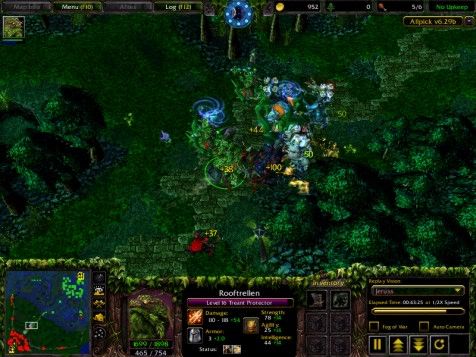
The three enemy heroes are destroyed and thanks to my ultimate this causes a huge powershift in the game. The golden rule of casting Overgrowth is.....If in doubt don't cast, wait for the opportune moment where there is:
1) multiple enemy heroes and 2) allied support.
The Refresher Orb / Necronomicon combo
In this image the game hangs in the balance with only four players who have not quit. I had to make sure I disabled both lich and lion with the first Overgrowth. After ten seconds of Rooftrellen, Bradwarden and two necros pounding on the beefed up mages they both were killed.
Note that Necronomicon helps rectify Overgrowths greatest limitation which is that most spells can be cast whilst units are disabled by the vines. The mana burn and feedback which the Necronomicon summon's possess eradicate mana fast enough to greatly reduce most heroes spell casting potential. A good tip for Necronomicon usage is to only summon the demons before a battle if you know rapid engagement is inevitable as the summons only have a 35 second duration, in most cases activate Necronomicon in a battle immediately after hitting "r" for he first time. In general it is better to cast Overgrowth for the second time a split second before the first has run out. If you do not do so you run the risk of enemy heroes disabling you and escaping, with practise you will know how much time the spell has left.
Problem Enemy Heroes
 Silencers/Mana Burners
Kiss Goodbye to a double ultimate if the opposing team has an adept Silencer due to global silence. Utilise Nature's guise before entering a team battle to stop pesky Silencing heroes (Traxex, Death Prophet) from realising your intention and casting silence before your first Overgrowth is activated. Heroes with mana burn such as the Nerubian Assassin and Keeper of the Light (Mana Leak) can also cause you to be unable to use your double overgrowth. A single overgrowth cast if well timed will almost always ensure that your team is victorious in a team battle however.
 Disablers
Disabling heroes such as Rhasta are doubly annoying for Rooftrellen. Not only do they hamper Rooftrellen in team battles where he is in his element using their disables to stop the double overgrowth, they also pose a danger to Rooftrellen's life. If you play conservatively and effectively with the treant protector he is a very difficult hero to kill (especially early and mid games). The most effective way to kill him is an enemy team gank with disablers. If Rhasta or other disablers are on the opposing team always be aware of this threat, especially if the minimap icons for the enemy heroes disappear.
(Note: If the enemy team is smart they will not choose Rooftrellen to gank as he is not an item/level dependent hero)
Useful Allied Heroes


Rooftrellen works well with almost every hero due to his support role within the team. He is particularly effective with high damage per second heroes (mainly combat agility heroes) and heroes with area of effect ultimates due to the synergy with Overgrowth's mass disable. Sand King's Epicentre, Crystal Maiden's Freezing Field and Enigma's Black Hole are all devastating in team battles combined with Rooftrellen's Ultimate. In high level games it is important that Rooftrellen is initially paired with a hero who has strong lane-control skills as this is not one of Rooftrellen's chief strengths.
Concluding Remarks
Thankyou for reading the guide I hope you have found it interesting and have learned a few things about playing the Treant Protector, my favourite DotA hero. If you wish to see how the guide works in DotA terms download the replays and give them a watch. Replay 1 demonstrates the strength of this build for Rooftrellen up to level 25. Replay 2 demonstrates that even though you are a supporting hero, kills are still relatively easy to come by. Replay 3 shows a well-rounded Rooftellen performance. If you have any questions or comments good or bad then i would love to hear them.
 Rooftrellan_what_a_win.w3g ( 412.39k ) Rooftrellen_Godlike_supporter.w3g ( 540.52k ) Rooftrellen_solid_performance.w3g ( 645.25k )
 Posted in: